Are you a vlogger looking to take your content to the next level? Want to create standout soundtracks and enhance your vlogs with professional-level audio edits? Look no further than FL Studio, the ultimate music production software for vlogging.
FL Studio is packed with versatile features that can transform the audio quality of your vlogs. Whether you’re a beginner exploring the world of music production or an experienced producer wanting to elevate your vlogging game, FL Studio has everything you need to create captivating soundscapes that resonate with your viewers.
In this article, we will delve into the various features and workflows of FL Studio that make it perfect for vlogging. From understanding the core features of the FL Studio desktop to optimizing your vlog’s sound, composing and sequencing music, and incorporating visuals with the Visualizer tool, we will guide you through the process of using FL Studio to enhance your vlog content.
Ready to unlock the full potential of your vlogs with FL Studio? Let’s dive in!
Key Takeaways
- FL Studio is a versatile music production software that can enhance the audio quality of your vlogs.
- Understanding the core features of the FL Studio desktop and its workflow is essential for efficient navigation.
- FL Studio offers a wide range of plugins, effects, and mixing tools to optimize your vlog’s sound.
- The Piano Roll and step sequences in FL Studio allow for seamless melody creation and dynamic rhythms.
- Navigating the FL Studio interface and customizing the Browser can improve your vlogging workflow.
Understanding the Versatility of FL Studio for Audio Editing
FL Studio is a powerful music production software that offers a wide range of features, making it a versatile tool for audio editing and music production. With its intuitive interface and extensive capabilities, FL Studio is trusted by professionals and beginners alike.
Key Features of the FL Studio Desktop
The FL Studio desktop is divided into several main windows that serve specific purposes to help you create and edit your music effectively.
- The Channel Rack: This window allows you to organize your instruments and samples, providing easy access to your sound library.
- The Piano Roll: With the Piano Roll, you can create melodies, chords, and other musical elements using a graphical interface. It provides precise control over your music composition.
- The Mixer: The Mixer window is where you can control the volume, panning, and effects of each individual track, allowing you to create a balanced and dynamic mix.
- The Playlist: The Playlist enables you to arrange and organize your audio clips, making it easier to create a cohesive track and structure your music.
These key features of the FL Studio desktop provide a solid foundation for your audio editing and music production workflow, allowing you to seamlessly navigate the software and access the tools you need.
Core Workflow for Music Production in FL Studio
Understanding the core workflow of FL Studio is essential for maximizing your productivity and creativity. Here is a step-by-step guide to the core workflow for music production:
- Import audio clips or create your own sounds using the Channel Rack and Piano Roll.
- Arrange your sounds and create a musical structure using the Playlist.
- Enhance your tracks with effects, mixing, and mastering using the Mixer.
- Experiment with different sounds and melodies to create a unique composition.
- Refine your music by fine-tuning the arrangements, adjusting volumes, and adding final touches.
- Export your finished tracks in your desired format, ready for distribution or further editing.
By following this core workflow, you can effectively utilize FL Studio’s features and unleash your creativity to produce professional-quality music.
With a deep understanding of the FL Studio desktop and the core workflow for music production, you can make the most out of this versatile software. Whether you’re editing audio, composing music, or creating unique soundscapes, FL Studio provides the tools and flexibility to bring your musical ideas to life.
Optimizing Your Vlog’s Sound: The FL Studio Music Production Software
When it comes to vlogging, sound quality is crucial in creating engaging content. FL Studio, with its advanced music production tools, provides the perfect solution for optimizing your vlog’s sound. Whether you want to enhance the audio recorded during your vlog or create custom soundtracks, FL Studio offers a wide range of plugins, effects, and mixing tools to achieve professional-level sound quality.
With FL Studio, you have access to a comprehensive library of plugins that can enhance your vlog’s sound in various ways. From EQs and compressors to reverbs and delays, these plugins allow you to fine-tune your audio and create immersive soundscapes. Additionally, FL Studio’s mixer provides precise control over channel levels, panning, and effects, ensuring that every element of your vlog’s sound is optimized.
One of the key features of FL Studio is its ability to handle multiple tracks, allowing you to layer different audio elements seamlessly. This flexibility allows you to create complex soundscapes by combining different recordings, loops, and virtual instruments.
Furthermore, FL Studio’s intuitive interface makes it easy to edit and manipulate your vlog’s sound. You can easily cut, copy, and paste audio segments, adjust the timing and duration of audio clips, and apply various effects and filters to achieve the desired sound quality.
In addition to enhancing the audio recorded during your vlog, FL Studio also enables you to create custom soundtracks. Whether you’re looking for upbeat and energetic music or calm and melodic tunes, FL Studio’s comprehensive suite of virtual instruments and MIDI capabilities allows you to compose and arrange your own unique soundtracks.
To further optimize your vlog’s sound, FL Studio offers advanced automation features. Automation allows you to control different parameters over time, such as volume, panning, and effects, adding depth and dynamics to your sound. With FL Studio’s automation tools, you can create smooth transitions, build tension, and highlight key moments in your vlogs.
By leveraging the power of FL Studio’s music production software, you can optimize your vlog’s sound and create a unique audio experience for your viewers. Whether you’re a beginner or an experienced vlogger, FL Studio provides the tools and capabilities you need to elevate your vlogging content to the next level.
With FL Studio, you have the power to take control of your vlog’s sound and create professional-quality audio that captivates your audience. So why settle for mediocre sound when FL Studio can transform your vlogging experience? Explore the possibilities, experiment with different effects and plugins, and let FL Studio help you optimize your vlog’s sound to create a truly immersive audiovisual experience.
Step by Step: Composing and Sequencing with FL Studio
Composing and sequencing are fundamental steps in music production, and FL Studio provides powerful tools to help you in the process. The Piano Roll is a versatile feature that allows you to create melodies, chords, and other musical elements using a graphical interface. Additionally, integrating step sequences in FL Studio can add dynamic rhythms to your compositions. In this section, we will guide you through the process of creating melodies with the Piano Roll and utilizing step sequences for dynamic rhythms in FL Studio.
Creating Melodies with the Piano Roll
The Piano Roll in FL Studio is a powerful tool for composing melodies. It provides a graphical representation of a piano keyboard, allowing you to easily place and edit notes. To create a melody, simply click on the Piano Roll and select the desired note duration, pitch, and velocity. You can also apply various techniques like legato, staccato, and vibrato to add expression to your melodies. FL Studio offers a range of editing options, such as looping, copying, and pasting, to help you refine your melodies.

Integrating Step Sequences for Dynamic Rhythms
FL Studio’s step sequencer is a powerful tool for creating dynamic rhythmic patterns. It allows you to define patterns by sequencing individual steps, each representing a specific note or drum hit. By combining different patterns and adjusting their timing, you can create intricate and evolving rhythms. The step sequencer also offers features like swing, randomization, and humanization to add variation and groove to your sequences. FL Studio provides a wide range of built-in step sequencers for different instruments, including drums, basslines, and melodies.
By combining the creative possibilities of the Piano Roll and step sequencer in FL Studio, you can unleash your musical ideas and create compelling compositions. Experiment with different melodies, harmonies, and rhythms to find the perfect combination for your music.
| Benefits of Composing and Sequencing with FL Studio | How to Use FL Studio’s Piano Roll | Tips for Utilizing Step Sequences in FL Studio |
|---|---|---|
| 1. Easy creation of melodies, chords, and musical elements | 1. Open FL Studio and select the desired instrument | 1. Experiment with different step patterns and sequencing options |
| 2. Graphical interface for intuitive note placement and editing | 2. Access the Piano Roll by double-clicking on the instrument in the Channel Rack | 2. Combine patterns to create evolving and dynamic rhythms |
| 3. Extensive editing options for fine-tuning melodies | 3. Click on the Piano Roll to place and edit notes | 3. Use swing, randomization, and humanization for added variation |
| 4. Integration with step sequencers for rhythmic creativity | 4. Experiment with note durations, pitch, and velocity | 4. Explore FL Studio’s built-in step sequencers for drums, basslines, and melodies |
Navigating the FL Studio Interface for Vlogging Enhancement
Navigating the FL Studio interface is essential for enhancing your vlogging experience. By understanding the main windows and their functions, you can effectively access the various features and tools that FL Studio offers. Additionally, customizing the Browser can help you organize and access your files more efficiently.
Main Windows and Their Functions
FL Studio consists of several main windows that serve different purposes in the music production process. These windows include:
- Channel Rack: The Channel Rack is where you can organize and control your instrumental and audio tracks. It allows you to sequence patterns, add effects, and adjust parameters.
- Mixer: The Mixer is where you can mix and master your audio tracks. It provides various tools for adjusting volume, panning, and adding effects to achieve the desired sound.
- Piano Roll: The Piano Roll is a graphical interface that allows you to create melodies, chords, and other musical elements. It provides a flexible and intuitive way to compose music.
- Playlist: The Playlist is where you can arrange and organize your audio and pattern clips. It allows you to create a timeline for your music composition or vlog soundtrack.
Understanding the functions of these main windows is crucial for effectively utilizing FL Studio’s capabilities and streamlining your workflow.
Customizing the Browser for Efficient File Access
The Browser in FL Studio allows you to access and manage your files, plugins, samples, and presets. By customizing the Browser, you can enhance your file access efficiency and workflow. Here are some tips for customizing the Browser:
- Create Folders: Organize your files into specific folders to easily locate them when working on your vlogs.
- Add Favorites: Mark frequently used files or folders as favorites for quick access.
- Utilize Tags: Assign tags to files or samples to categorize them based on their type or characteristics.
- Search Function: Take advantage of the search function within the Browser to quickly find specific files or plugins.
By customizing the Browser to suit your preferences and organizing your files effectively, you can optimize your file access and improve your vlogging workflow within FL Studio.
Maximizing the Potential of VST Plugins in FL Studio
VST plugins are powerful tools that can greatly enhance your music production experience. In FL Studio, you have the ability to maximize the potential of VST plugins, expanding your creative possibilities and taking your vlogs to the next level.
FL Studio has excellent compatibility with VST plugins, allowing you to seamlessly incorporate a wide range of audio effects and virtual instruments into your projects. Whether you want to add unique sound textures, create intricate audio effects, or evoke specific moods, VST plugins offer endless possibilities for experimentation and creativity.
With FL Studio’s intuitive interface, you can easily integrate VST plugins into your workflow. Simply load the VST plugins onto the mixer track or the plugin window, and you’ll have instant access to a world of sonic possibilities. Whether you’re a beginner or an experienced producer, FL Studio makes it easy to explore and implement various VST plugins.
By leveraging the power of VST plugins in FL Studio, you can create unique sounds that elevate your vlogs to new heights. Experiment with different plugins and their parameters to develop your signature sound and enhance the overall production quality of your content.
“With the vast array of VST plugins available, FL Studio empowers you to customize and shape your sound in ways that were once unimaginable. From realistic instrument emulations to complex audio effects, the possibilities are endless. Let your creativity run wild and discover the immense potential of VST plugins in FL Studio.”
To enhance your understanding of integrating VST plugins in FL Studio, refer to the following table for some popular VST plugins and their functionalities:
| VST Plugin | Functionality |
|---|---|
| Native Instruments Kontakt | Advanced sampler with a vast library of realistic instrument sounds |
| Waves SSL Channel | Emulates the renowned SSL console’s channel strip for professional mixing |
| Valhalla VintageVerb | Delivers lush, classic reverb effects for atmospheric soundscapes |
| FabFilter Pro-Q 3 | Precision EQ plugin for surgical sound shaping and mastering |
By incorporating VST plugins into your FL Studio workflow, you’ll have the tools at your disposal to create unique sounds, enhance your vlog’s audio, and captivate your audience with a professional-level production. Experiment, explore, and maximize the potential of VST plugins in FL Studio to unlock a world of creative possibilities.
FL Studio’s Digital Audio Workstation: An Overview
FL Studio is a comprehensive digital audio workstation (DAW) that provides all the necessary tools and features for music production. Whether you’re a beginner or an experienced producer, FL Studio offers a user-friendly interface coupled with powerful capabilities to bring your musical ideas to life.
At the heart of FL Studio’s production process is the Channel Rack. This versatile tool allows you to organize and control your instruments, samples, and audio clips. It serves as a central hub where you can create, manipulate, and arrange your musical elements with ease. With the Channel Rack, you can unleash your creativity by experimenting with different sounds and instruments to craft unique compositions.
Another essential component of FL Studio is the Mixer. The Mixer facilitates precise audio control by providing a wide range of mixing and mastering tools. With its intuitive interface, you can adjust volume levels, apply EQ and effects, create dynamic mixes, and achieve professional-quality sound for your tracks. The Mixer ensures that every element of your music blends seamlessly, resulting in a polished and cohesive final product.
| FL Studio’s Digital Audio Workstation: Key Features | |
|---|---|
| Channel Rack | Organize and control instruments, samples, and audio clips |
| Mixer | Facilitates audio control, mixing, and mastering |
FL Studio’s powerful combination of the Channel Rack and Mixer sets it apart as a leading digital audio workstation in the music production industry. Whether you’re creating electronic music, hip-hop beats, film scores, or any other genre, FL Studio empowers you to shape your sound and bring your artistic vision to life.
The Art of Beat Making in FL Studio for Engaging Vlog Content
Creating captivating beats is essential for engaging vlog content, and FL Studio offers powerful tools for beat making. In this section, we will explore the art of beat making in FL Studio and guide you through utilizing the Step Sequencer, sampling, and looping techniques.
Utilizing the Step Sequencer
The Step Sequencer is a valuable feature in FL Studio that allows you to create rhythmic patterns and control various parameters. With its intuitive interface, you can easily program and arrange drum patterns, melodies, and other musical elements. The Step Sequencer offers flexibility and precision, making it an indispensable tool for beat making in FL Studio.
Sampling and Looping Techniques
FL Studio provides sampling and looping techniques that allow you to add unique elements to your beats. Sampling allows you to take existing audio recordings and incorporate them into your music, adding texture and depth to your beats. Additionally, FL Studio’s looping capabilities enable you to create repetitive patterns and seamless transitions in your tracks. By leveraging these techniques, you can bring your beat making to the next level and create compelling vlog content.
Whether you’re a seasoned producer or just starting out, FL Studio offers an extensive range of tools and features for beat making. The Step Sequencer and sampling and looping techniques provide you with the creative freedom to craft unique and captivating beats for your vlogs. Experiment with different sounds, rhythms, and textures to create a signature style that sets your vlogs apart. Let FL Studio be your ultimate companion in producing engaging vlog content through the art of beat making.
Audio Recording in FL Studio: Enhancing Your Vlog’s Narration
Narration is a vital aspect of vlogs, bringing your content to life and engaging your viewers. With FL Studio’s robust audio recording and editing capabilities, you can take your vlog narration to the next level.
FL Studio offers a seamless audio recording experience, allowing you to easily capture voiceovers and narrations for your vlogs. Whether you’re using a microphone or recording directly into FL Studio, you have the flexibility to achieve professional-quality audio.
Once you’ve recorded your narration, FL Studio’s audio editing tools come into play. You can fine-tune your recordings, remove any unwanted background noise, and ensure crystal-clear audio for your vlogs.
Furthermore, FL Studio’s effects processing capabilities enable you to enhance your narration even further. You can add reverb or other effects to create a specific ambiance or apply equalization to balance the frequencies for a more polished sound.
By leveraging FL Studio’s audio recording and editing features, you can easily produce engaging and professional vlog narration that captivates your audience.
Editing and Arranging: Crafting the Perfect Vlog Soundtrack with FL Studio
Editing and arranging play a crucial role in creating the perfect vlog soundtrack, and FL Studio offers a range of powerful tools to help you achieve this goal. With FL Studio, you can take control of your tracks and bring them to life through automation and arrangement in the Playlist Editor.
Using Automation to Add Life to Your Tracks
Automation is a powerful tool in FL Studio that allows you to control various parameters over time, adding dynamics and expression to your tracks. By automating volume, panning, effects, and other settings, you can create seamless transitions, build tension, and highlight important elements in your vlog soundtrack.
With FL Studio’s intuitive automation features, you can easily draw in automation curves or record live automation movements. This level of control allows you to precisely sculpt the sound of your tracks, making them fit perfectly with the visuals and mood of your vlogs.
The Playlist Editor as a Tool for Arrangement
The Playlist Editor in FL Studio is a versatile tool that allows you to arrange your audio clips, loops, and patterns to create a cohesive vlog soundtrack. By placing your clips onto the Playlist, you can easily organize and sequence them, adjusting their length, position, and order to achieve the desired flow and structure.
In addition to arranging audio clips, the Playlist Editor also supports arranging automation clips, MIDI data, and even video clips, providing a comprehensive platform for creating engaging vlog soundtracks. You can easily drag and drop clips, resize them, and add transitions to ensure a seamless progression of audio elements throughout your vlogs.
With the Playlist Editor, you have full control over the arrangement of your vlog soundtrack. You can experiment with different arrangements, create variations, and fine-tune every aspect to create the perfect audio backdrop for your vlogs.
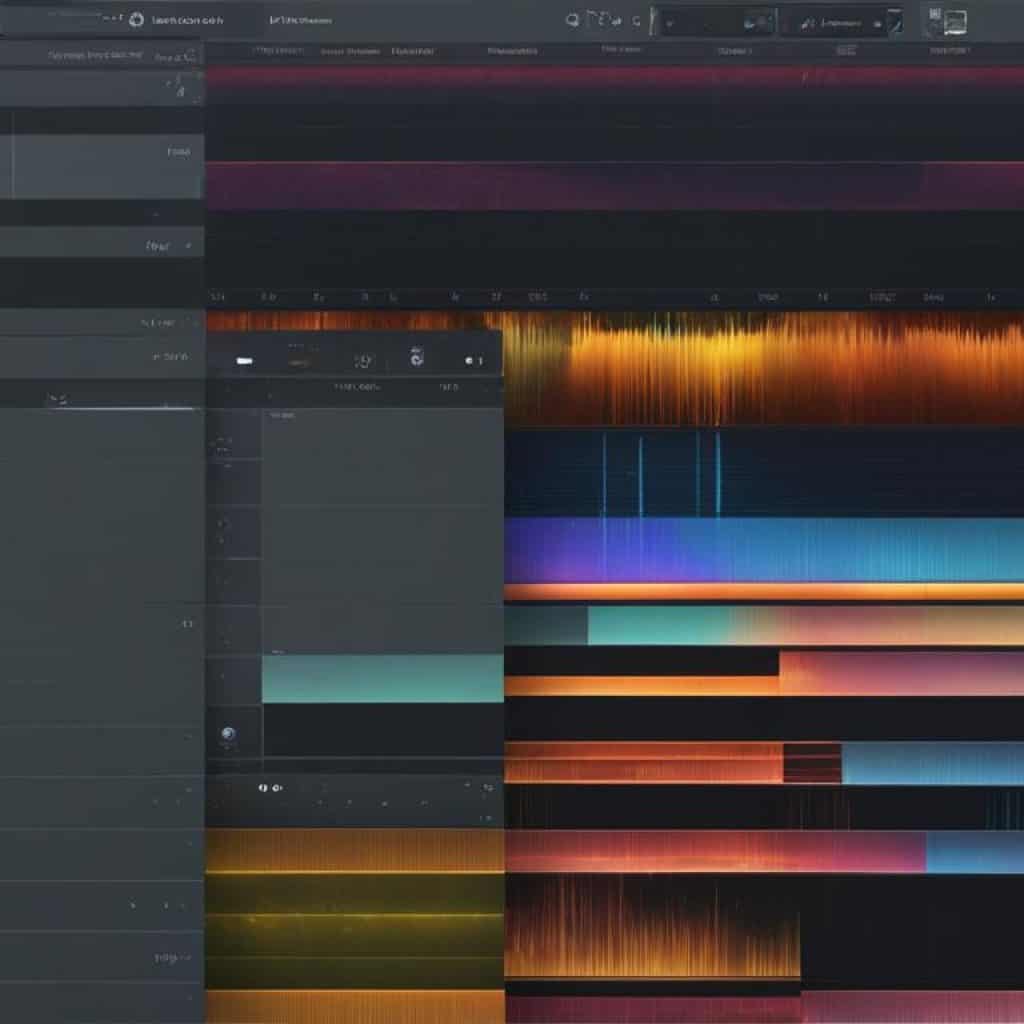
By utilizing the automation and arrangement features of FL Studio, you can craft the perfect vlog soundtrack that captures the essence of your content and captivates your viewers. Whether you want to create dramatic crescendos, smooth transitions, or energetic beats, FL Studio provides the tools you need to bring your creative vision to life.
Transferring and Syncing FL Studio Mobile Projects for Vlogging
FL Studio Mobile provides the convenience of mobile editing, allowing you to work on your projects anytime, anywhere. Whether you’re on the go or prefer the flexibility of using your mobile device, FL Studio Mobile ensures that you never miss a creative spark. With FL Studio Mobile, you can sketch out ideas, create beats, record vocals, and much more, all from the palm of your hand.
However, transferring and syncing your FL Studio Mobile projects with the desktop version of FL Studio is essential to maintain a seamless workflow and ensure no progress is lost. The ability to harmonize your mobile and desktop production allows you to leverage the best of both worlds and maximize your creativity.
To transfer your projects from FL Studio Mobile to the desktop version, follow these simple steps:
- Export your FL Studio Mobile project as a zip file.
- Transfer the zip file to your computer using a file transfer method such as email, cloud storage, or USB connection.
- Open FL Studio on your desktop and import the zip file into the program.
- FL Studio will automatically extract the project from the zip file and load it into the desktop version.
- You can now continue working on your project seamlessly across both FL Studio Mobile and the desktop version.
It’s important to note that syncing your projects between FL Studio Mobile and the desktop version requires a file transfer method such as cloud storage. By saving your project files to a cloud storage service like Google Drive or Dropbox, you can access and edit them from any device with FL Studio installed. This ensures that your projects are always up to date and accessible no matter where you are.
The Convenience of Mobile Editing
One of the major advantages of FL Studio Mobile is its ability to provide convenient mobile editing capabilities. You can work on your projects while on the move, during travel, or even when inspiration strikes in unexpected places. The mobile version of FL Studio offers a user-friendly interface that allows you to access essential tools and features directly from your smartphone or tablet.
Whether you want to lay down a melody, create a beat, or fine-tune a vocal recording, FL Studio Mobile puts the power of music production in the palm of your hand. It’s an ideal solution for vloggers who are constantly on the move and need a versatile tool that can keep up with their creative ideas.
Harmonizing Mobile and Desktop Production
Transferring and syncing your FL Studio Mobile projects with the desktop version allows you to harmonize your mobile and desktop production seamlessly. When working on a project, you can start it on FL Studio Mobile, capture initial ideas, and make on-the-go adjustments. Then, when you’re back at your workstation, you can continue working on the same project using the full capabilities of the desktop version.
This harmonization ensures that you can maintain your creative flow even when transitioning between devices. It allows you to leverage the convenience of mobile editing without sacrificing the power and capabilities of the desktop version. By syncing your projects, you can seamlessly transition from mobile to desktop production, working on your projects wherever and whenever inspiration strikes.
FL Studio Tutorials: A Resource for Vloggers
Learning FL Studio can be an exciting and rewarding journey, especially for vloggers looking to enhance their music production skills. To help you along the way, FL Studio offers a wide range of tutorials that cover various topics and techniques. Whether you’re a beginner or an experienced music producer, these tutorials provide valuable insights and practical guidance to improve your music production abilities.
FL Studio tutorials come in both official and user-created formats, providing a diverse range of learning resources. Official tutorials, created by the FL Studio team, offer in-depth explanations and demonstrations of key features and workflows. User-created tutorials, on the other hand, provide unique perspectives and specialized knowledge shared by fellow vloggers and music producers.
By following FL Studio tutorials, vloggers can learn how to:
- Create compelling soundtracks for their vlogs
- Optimize audio quality and make their vlog sound more professional
- Compose and sequence music using FL Studio’s powerful tools
- Navigate the interface efficiently and use various features effectively
- Maximize the potential of virtual instruments and audio effects
Whether you prefer video tutorials, step-by-step written guides, or interactive courses, FL Studio offers a wealth of learning resources to suit your preferred learning style. These tutorials not only help you improve your music production skills but also provide inspiration and ideas for creating unique and captivating vlog content.
So, don’t miss out on this valuable resource. Explore the FL Studio tutorials available and start enhancing your music production abilities to take your vlogs to the next level.
Incorporating Visuals and Music with FL Studio’s Visualizer Tool
Visuals are an essential element in creating engaging vlogs, and FL Studio’s Visualizer tool provides a powerful way to incorporate visuals into your music releases. The Visualizer tool in FL Studio allows you to create visually stunning videos that complement your music and enhance the overall viewing experience. With its library of templates designed for various social media platforms, you can easily create videos that are optimized for sharing on platforms like YouTube, Instagram, and TikTok.
To add visuals to your music, simply import your audio track into FL Studio and open the Visualizer tool. From there, you can choose from a range of visually captivating templates that are specifically designed to synchronize with your music. The Visualizer tool gives you the flexibility to customize the visuals by clicking and dragging text and other layers, allowing you to create a unique visual representation of your music.

The Visualizer tool in FL Studio is a great asset for vloggers who want to enhance their content with captivating visuals. Whether you’re creating a music video for your original compositions, showcasing a beat-making process, or even adding visual flair to your narrations, FL Studio’s Visualizer tool provides a creative outlet to elevate your vlogs.
Conclusion
FL Studio is the ultimate music production software for vloggers seeking to elevate their audio editing, music creation, and visual content. With its versatile features and user-friendly interface, FL Studio empowers vloggers to produce standout soundtracks, optimize their vlog’s sound quality, compose and sequence music with ease, and navigate the interface efficiently. By incorporating FL Studio into your vlogging workflow, you can take your content to new heights and deliver a truly unique audiovisual experience to your viewers.
With FL Studio, you have access to a comprehensive set of tools that enable you to create professional-grade soundtracks for your vlogs. Whether you’re enhancing existing audio recordings or composing your own music, FL Studio’s wide range of plugins, effects, and mixing tools provide endless possibilities for achieving high-quality sound. The software’s intuitive Piano Roll and seamless integration of step sequences help you create captivating melodies and dynamic rhythms, while its advanced automation and arrangement features allow you to craft the perfect vlog soundtrack.
FL Studio also excels in its interface design, offering a seamless and intuitive user experience. The software’s main windows, such as the Channel Rack, Piano Roll, Mixer, and Playlist, are thoughtfully designed to enhance your workflow and provide easy access to essential features and tools. Additionally, FL Studio’s Visualizer tool allows you to incorporate visually stimulating elements into your vlogs, making them even more engaging and captivating.
So why wait? Start using FL Studio for your vlogging endeavors and unlock the full potential of your creative vision. With FL Studio’s comprehensive features for audio editing, music production, and visuals, you have everything you need to deliver exceptional vlogs that stand out from the crowd. Don’t settle for mediocrity – embrace FL Studio and take your vlogs to the next level.
FAQ
What is FL Studio?
How can FL Studio enhance my vlogs?
What are the key features of the FL Studio desktop?
How can FL Studio optimize my vlog’s sound?
How can I compose and sequence music in FL Studio?
How can I navigate the FL Studio interface effectively?
How can I maximize the potential of VST plugins in FL Studio?
What is the importance of the Channel Rack and Mixer in FL Studio?
How can I create captivating beats in FL Studio?
How can FL Studio enhance my vlog’s narration?
How can I edit and arrange my vlog soundtrack in FL Studio?
How can I transfer and sync FL Studio Mobile projects for vlogging?
Are there tutorials available for learning FL Studio?
How can I incorporate visuals into my vlogs with FL Studio’s Visualizer tool?
Source Links
- https://www.image-line.com/fl-studio-learning/fl-studio-online-manual/html/basics_workflow.htm
- https://www.image-line.com/fl-studio-learning/fl-studio-mobile-online-manual/html/plugins/FL Studio Mobile_FLStudioPlugin.htm
- https://www.musicradar.com/news/fl-studio-207-makes-it-easy-to-create-a-social-media-music-video-inside-your-daw

















Add comment