
Are you ready to take your vlogging to the next level? Whether you’re a beginner or an experienced vlogger, one thing is clear – the quality of your videos can make or break your success. That’s where Adobe Premiere Pro comes in. This powerful video editing software is the go-to tool for vloggers looking to create professional-looking videos that stand out from the crowd.
But what makes Adobe Premiere Pro the ultimate video editing software for vlogging? How can it help you craft compelling stories and engage your audience? In this article, we’ll dive deep into the world of Adobe Premiere Pro and explore its features, capabilities, and tips for leveraging its full potential in your vlogging journey.

From trimming and organizing your clips to adjusting light and color, we’ll cover every aspect of video editing using Adobe Premiere Pro. We’ll also discuss the importance of audio quality, incorporating music and sound effects, and creating a consistent visual identity for your vlogs. With step-by-step tutorials and expert advice, you’ll learn how to master Premiere Pro and transform your vlogs into professional masterpieces.
So, are you ready to discover the secrets of Adobe Premiere Pro and unlock its full potential? Let’s dive in and revolutionize your vlogging editing game!
Key Takeaways
- Adobe Premiere Pro is a powerful video editing software for vlogging.
- It offers comprehensive features and a user-friendly interface for seamless editing and storytelling.
- Setting privacy boundaries and protecting personal information are crucial in vlogging.
- A well-crafted vlogging schedule helps achieve work-life balance.
- Engaging vlogs blend daily life with conversational elements and personal narratives.
Considering Privacy and Boundaries in Vlogging
When it comes to vlogging, privacy and setting boundaries are crucial considerations. As a vlogger, you are sharing aspects of your life with your audience, but it’s important to strike a balance between real-life and on-screen exposure.
Real-Life Versus On-Screen: Balancing Exposure
While authenticity is valued in vlogging, it is essential to maintain a sense of privacy. Sharing personal information without setting boundaries can expose you to potential risks. It’s important to carefully consider what aspects of your life you want to showcase in your vlogs and what you prefer to keep private.
Balancing exposure means being selective about the information, locations, and events you share on your vlog. By thoughtfully deciding what to include, you can maintain control over your personal privacy while still connecting with your audience.
Protecting Yourself from Digital Risks
Vlogging in the digital world comes with inherent risks. It’s crucial to be aware of these risks and take proactive measures to protect your personal information online.
Here are some steps you can take to safeguard your privacy:
- Use a pseudonym or stage name instead of your real name.
- Be cautious about sharing personal contact information, such as your address or phone number.
- Regularly review your privacy settings on social media platforms to ensure you have control over who can see your content.
- Be mindful of the images and videos you share, avoiding content that may compromise your safety or reveal sensitive information.
- Consider using a virtual private network (VPN) to encrypt your internet connection and protect your online activities.
By implementing these strategies, you can minimize the potential risks associated with vlogging and enjoy a safer online experience.
Crafting a Vlogging Schedule for Better Work-Life Balance
To achieve better work-life balance as a vlogger, it is important to craft a vlogging schedule. Establishing a consistent publishing routine helps you stay organized and maintain a regular flow of content for your audience. Effective time management is also crucial to allocate time for content creation and editing without feeling overwhelmed.
Establishing a Consistent Publishing Routine
One of the key elements of a successful vlogging schedule is establishing a consistent publishing routine. This means deciding on specific days and times each week when you will release new content. By adhering to a publishing schedule, you create a sense of reliability and expectation among your viewers. They will know when to anticipate your new videos, which can help to build a loyal following.
In order to establish a consistent publishing routine, consider the following tips:
- Create a content calendar: Plan out your video ideas and schedule them in a calendar. This will help you visualize your publishing schedule and ensure that you have a steady stream of content ideas.
- Set achievable goals: Determine how often you can realistically publish new videos. Be honest with yourself about your available time and resources. It may be better to start with a lower frequency and gradually increase as you become more comfortable and efficient.
- Batch recording sessions: Dedicate specific periods of time for recording multiple videos in one sitting. This allows you to create a backlog of content, making it easier to stick to your publishing schedule even when unexpected circumstances arise.
- Communicate with your audience: Let your viewers know about your publishing schedule. Mention it in your videos, on your social media platforms, and in your channel description. This will keep your audience informed and build anticipation for your upcoming content.
Managing Time for Content Creation and Editing
Time management is crucial for maintaining a vlogging schedule while still balancing other aspects of your life. Here are some time management tips for content creation and editing:
- Set dedicated time blocks: Allocate specific periods in your schedule for content creation and editing. Treat this time as you would any other appointment or commitment.
- Prioritize tasks: Determine which tasks are most important and need to be completed first. Focus on high-priority tasks during your dedicated time blocks.
- Eliminate distractions: Minimize distractions during your content creation and editing sessions. Turn off notifications on your phone, close unnecessary tabs on your computer, and create a conducive work environment.
- Use productivity tools: Explore productivity apps and software that can help you stay organized and manage your time effectively. Consider using task management tools, project management software, and timers to keep yourself on track.
- Delegate and outsource when possible: If certain tasks can be outsourced or delegated, such as video editing or administrative work, consider enlisting the help of professionals or leveraging freelance platforms to free up more time for other aspects of your vlogging journey.
By crafting a vlogging schedule, establishing a consistent publishing routine, and managing your time effectively, you can achieve better work-life balance as a vlogger. Remember, finding a balance that works for you may take some trial and error, but with perseverance and dedication, you can create a sustainable vlogging routine that allows you to thrive both personally and professionally.
Understanding the Anatomy of Engaging Vlogs
Engaging vlogs have a specific anatomy that captivates audiences. By blending daily life with conversational elements, vloggers create a personal and relatable experience for viewers. Moreover, incorporating personal narratives in vlogs enhances the storytelling aspect, creating a deeper connection with the audience.
Blending Daily Life with Conversational Elements
Vlogs that seamlessly blend daily life with conversational elements offer viewers a window into the vlogger’s authentic experiences. By sharing relatable stories, thoughts, and observations, vloggers create a sense of connection and familiarity. This approach transforms viewers into active participants in the vlog.
This engagement arises from vloggers creating a casual and conversational tone, as if they were speaking directly to their friends. Including everyday activities, such as cooking, shopping, or taking care of pets, enhances the relatability of the vlog. Incorporating humor, jokes, or light-hearted banter creates an enjoyable and entertaining viewing experience.
Why Personal Narratives Resonate with Audiences
Personal narratives are a powerful tool in vlogging, as they allow vloggers to share their lived experiences and connect with their audience on a deeper level. When vloggers open up about their life, challenges, and personal growth, viewers feel a sense of empathy and emotional validation.
The inclusion of personal narratives adds an element of authenticity to the vlogs, creating a genuine connection between the vlogger and their audience. This connection fosters a sense of trust and loyalty, as viewers appreciate the vulnerability and transparency displayed by the vlogger.
“Personal narratives add depth and meaning to vlogs. By sharing our personal stories, we create a sense of community and inspire others through our experiences.” – Sophie Thompson, lifestyle vlogger
Visual elements, such as images or videos, can further enhance the storytelling aspect of vlogs. Including relevant visuals that complement personal narratives adds depth and engages the audience visually.
Incorporating daily life vlogging elements and storytelling techniques creates a compelling vlog that resonates with audiences. By embracing authentic experiences and personal narratives, vloggers can cultivate a loyal and engaged following.
Preparing Your Vlog Content: Recording Tips
When it comes to creating impressive vlogs, preparation is key. In this section, we’ll explore essential recording tips and techniques to help you capture high-quality footage that will engage and delight your audience.
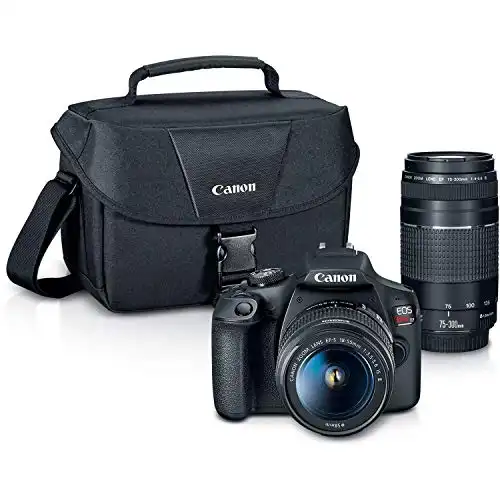
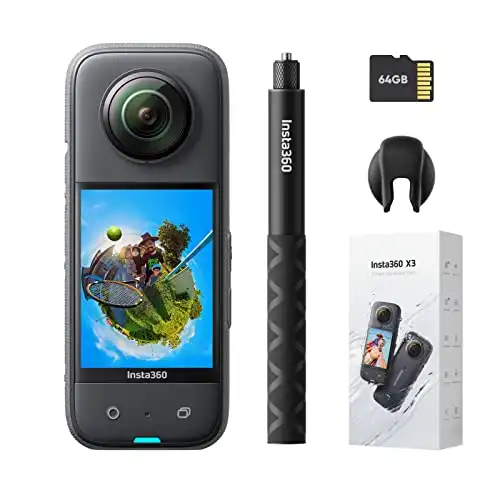
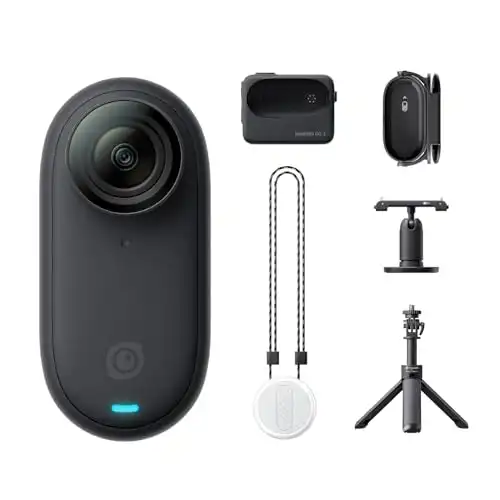
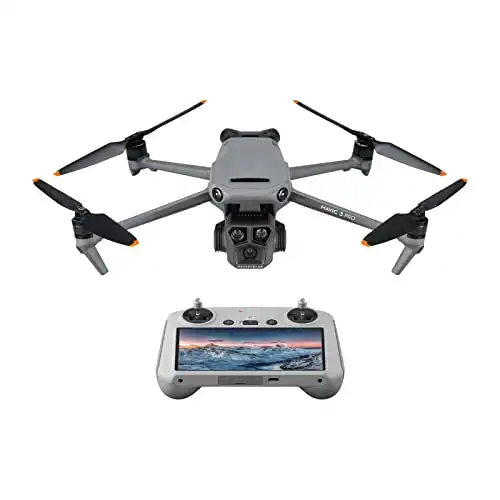
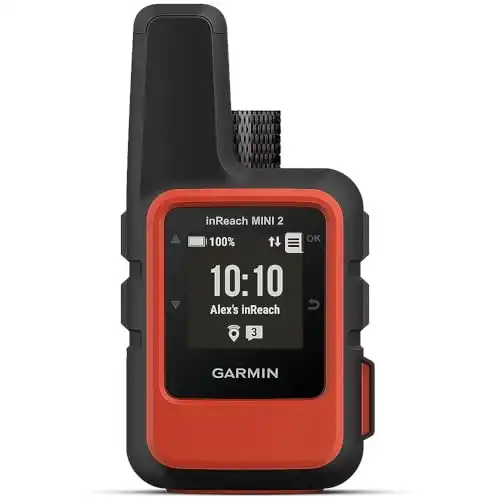
Choosing the Right Equipment for High-Quality Footage
Investing in the right vlogging equipment is crucial for ensuring that your footage is of the highest quality. Consider the following factors when selecting your equipment:
- Camera: Choose a camera that suits your vlogging style and provides excellent video resolution.
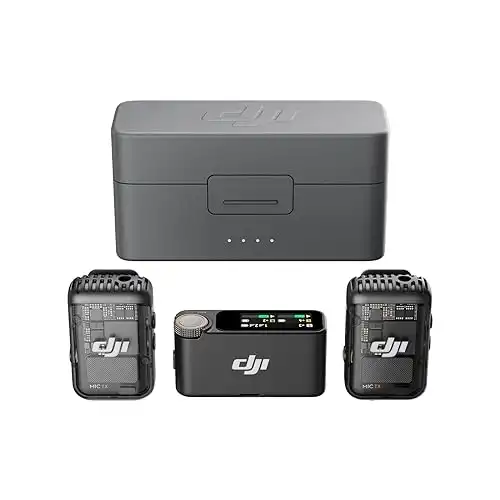
- Microphone: To ensure clear and professional audio, invest in a high-quality external microphone.
- Tripod or Gimbal: Stability is key to producing smooth videos, so using a tripod or gimbal can greatly improve the quality of your footage.
By using reliable vlogging equipment, you’ll be able to capture every detail and provide your viewers with a visually stunning experience.

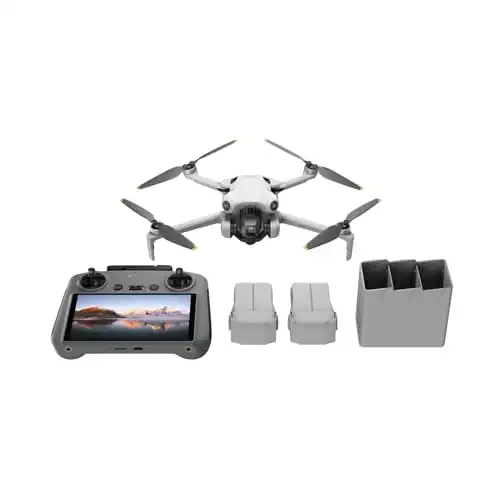
Utilizing Creative Angles for Enhanced Visuals
In addition to high-quality equipment, utilizing creative camera angles can elevate the visual appeal of your vlogs. Consider the following techniques:
- Low Angle: Shoot from a low angle to add a sense of power and drama to your footage.
- Bird’s Eye View: Capture shots from above to offer a unique and interesting perspective.
- Dutch Angle: Tilt your camera slightly to create a visually dynamic and unconventional look.
By experimenting with different camera angles, you can add visual interest and make your vlogs more engaging and captivating.
Creating Your First Adobe Premiere Pro Project
Embarking on your vlogging journey means stepping into the world of Adobe Premiere Pro, the industry-leading video editing software. In this section, we will walk you through the process of creating your first Adobe Premiere Pro project, enabling you to unleash your creativity and bring your vlogs to life.
Adobe Premiere Pro provides a seamless interface that empowers both novice and experienced editors to craft professional-quality videos. Let’s dive into the steps involved in setting up your project and getting acquainted with the powerful features of Premiere Pro.
To start your Adobe Premiere Pro project:
- Launch Premiere Pro and navigate to the “File” menu.
- Select “New” and then “Project.”
- Choose a name and location for your project file.
- Specify the desired video settings such as resolution and frame rate.
- Click “OK” to create your project.
Once you’ve created your project, you’ll be greeted by the intuitive interface of Adobe Premiere Pro. Familiarize yourself with the various panels and tools available to enhance your editing workflow. The Project panel allows you to import and organize your media files, while the Timeline panel is where you’ll assemble your video clips and apply edits.
It’s crucial to import your media files into the project before you begin editing. To import files:
- Open the Project panel.
- Right-click within the panel and select “Import.”
- Select the media files you want to import from your computer.
- Click “Import” to add the files to your project.
Now that your project is set up and your media files are imported, you’re ready to start editing your vlog. In the upcoming sections, we’ll guide you through the essential editing techniques and features offered by Adobe Premiere Pro, empowering you to create compelling and engaging vlogs that captivate your audience.
Adobe Premiere Pro: A Guide to Editing Your Vlog
Adobe Premiere Pro is an incredibly powerful tool for editing your vlogs and bringing your creative vision to life. In this section, we will explore the various editing techniques and features offered by Premiere Pro to help you create polished and professional vlogs.
Trimming and Organizing Your Clips
One of the first steps in editing your vlog is trimming your clips to remove any unwanted footage and create a cohesive narrative. Premiere Pro provides intuitive tools that make this process seamless. Use the Razor tool to split clips and the Select tool to delete or rearrange sections. Additionally, the Project panel allows you to organize your footage and easily access the clips you need for editing.
By trimming and organizing your clips effectively, you can refine your vlog’s pacing and ensure that only the most compelling content makes it into the final edit.
Utilizing Tools for a Sleek Finish
Premiere Pro offers a wide range of editing tools to help you achieve a sleek and professional finish for your vlogs. Here are some essential tools to explore:
- Transitions: Add smooth transitions between clips to enhance the flow of your vlog and create visual interest.
- Effects: Apply effects such as color grading, slow motion, and stabilization to enhance the overall look and feel of your vlogs.
- Titles and Graphics: Use Premiere Pro’s built-in tools to create eye-catching titles and graphics that add a professional touch to your vlogs.
- Audio Editing: Adjust audio levels, add sound effects, and apply filters to ensure crisp and clear audio in your vlogs.
By utilizing these editing tools, you can elevate the quality of your vlogs and create a visually stunning and engaging experience for your viewers.
Now that we’ve covered the basics of editing your vlog in Adobe Premiere Pro, let’s move on to the next section, where we will explore refining video quality and adjusting light and color for your vlogs.
Refining Video Quality: Adjusting Light and Color
Video quality is a crucial element in creating impactful vlogs. To ensure your videos look their best, it’s essential to refine the video quality through adjustments to light and color. Adobe Premiere Pro provides powerful tools and features to enhance the overall visual appeal of your footage.
Enhancing Dark or Overexposed Footage
When recording vlogs, it’s common to encounter footage that is either too dark or overexposed. In such cases, Adobe Premiere Pro offers various adjustment options to improve the exposure and bring out the details in your videos. By adjusting the brightness, contrast, and shadows, you can create a balanced and visually pleasing look.
To enhance dark footage, increase the brightness and shadows while reducing the contrast to reveal the details. Similarly, for overexposed footage, decrease the brightness and highlights while increasing the contrast to restore the natural tones and highlights.
Editing for Consistency Across Clips
Achieving consistency in editing is vital for creating a seamless flow in your vlogs. Adobe Premiere Pro provides tools and techniques to ensure that your clips have a uniform look and feel.
One way to achieve consistency is by applying color correction and grading techniques. This process involves adjusting the color balance, saturation, and tones to match the overall aesthetic of your vlogs. By establishing a consistent color palette, you can create a cohesive visual experience for your viewers.
Another approach is to use presets or create custom templates for your editing workflow. By applying the same settings to each clip, you can maintain a consistent style throughout your vlogs. This includes parameters such as sharpness, noise reduction, and visual effects.
Remember, consistency in editing helps create a professional and polished look for your vlogs. Take advantage of Adobe Premiere Pro’s features to refine the video quality, adjust light and color, and enhance your footage to captivate your audience.
Maintaining Professional Audio Standards in Premiere Pro
When it comes to creating engaging vlogs, professional audio quality is just as important as captivating visuals. Poor audio can greatly diminish the impact of your content, making it challenging for viewers to fully engage with your message. To ensure your vlogs have exceptional audio, Adobe Premiere Pro provides powerful tools for audio editing and enhancing. By leveraging the capabilities of Premiere Pro, you can achieve professional audio standards that elevate the overall quality of your vlogs.
Normalizing Audio Levels for Clarity
One common issue in vlogging is inconsistent audio levels. Normalizing audio levels refers to the process of adjusting volume levels across different audio clips to create a consistent listening experience for your viewers. Adobe Premiere Pro offers a simple and efficient way to normalize audio levels. By selecting the audio clips you want to normalize and applying the “Normalize Peaks” effect, Premiere Pro automatically adjusts the volume levels, ensuring clear and balanced audio throughout your vlog.

Importance of Audio Consistency in Vlogging
Audio consistency is key to creating a professional and cohesive vlog. With consistent audio levels, your viewers can focus on the content without being distracted by sudden changes in volume. Maintaining audio consistency also helps in creating a seamless viewing experience when transitioning between different parts of your vlog. Whether you are recording audio on location or adding background music, Adobe Premiere Pro provides tools and features to ensure a consistent audio experience for your audience.
By leveraging the capabilities of Adobe Premiere Pro, you can maintain professional audio standards in your vlogs. Take advantage of the tools and techniques available in Premiere Pro to normalize audio levels and achieve audio consistency, creating a captivating and immersive experience for your viewers.
Incorporating Royalty-Free Music and Sound Effects
Music and sound effects play a significant role in enhancing the impact of your vlogs. They add depth, emotion, and excitement to your videos, making them more engaging and memorable for your audience. Incorporating royalty-free music and sound effects into your vlogs not only elevates the overall production value but also ensures that you are using legal and copyright-free audio content.
When it comes to finding royalty-free music and sound effects for your vlogs, there are many resources available online. Websites like Epidemic Sound, Artlist, and AudioJungle offer a vast library of high-quality, royalty-free music tracks and sound effects that you can use in your videos without any legal complications. These platforms provide a wide range of genres and styles to suit different moods and themes, allowing you to find the perfect audio accompaniment for your vlogs.
Adding music to your vlogs can help set the tone, create an atmosphere, and enhance the storytelling aspect of your videos. Whether you’re looking for upbeat tracks to energize your travel vlogs or gentle melodies to accompany your introspective moments, there is a wealth of options available to cater to your creative vision.
Similarly, incorporating sound effects in your vlogs can bring specific actions, events, or environments to life. From ambient sounds like rain or birds chirping to dramatic effects like explosions or crowd applause, sound effects can add depth and realism to your videos.
When adding music and sound effects to your vlogs, it’s important to consider the balance between the audio and your dialogue or narration. Ensure that the music and sound effects enhance your storytelling without overpowering your voice or distracting from the main content.
With Adobe Premiere Pro, you can easily import and incorporate royalty-free music and sound effects into your editing timeline. The software provides intuitive tools for adjusting audio levels, synchronizing the audio with your footage, and creating seamless transitions between different audio clips. Take advantage of these features to ensure that your music and sound effects blend seamlessly with your visuals.
Remember, when using music and sound effects in your vlogs, always give proper credit to the artists and creators. Read and understand the licensing terms of the audio content you use to avoid any copyright infringements.
Incorporating royalty-free music and sound effects into your vlogs can have a significant impact on the overall quality and appeal of your videos. Take the time to find the right audio content that complements your vlog’s theme and style. With the right music and sound effects, you can create immersive and captivating vlogs that keep your audience engaged from start to finish.
Styling Your Vlog with Transitions and Visual Flair
Adding transitions and visual flair to your vlogs can elevate the overall look and feel of your videos. With Adobe Premiere Pro’s powerful editing capabilities, you can easily enhance your vlogs with captivating transitions and stunning visual effects. In this section, we will explore how to style your vlogs using transitions and visual flair, and we’ll take a closer look at navigating Premiere Pro’s effects library and timing transitions for maximum viewer engagement.
Navigating Premiere Pro’s Effects Library
Premiere Pro’s effects library is a treasure trove of tools and effects that can help you customize and enhance your vlogs. Whether you’re looking for simple transitions or eye-catching visual effects, the effects library has everything you need to make your videos stand out.
To access the effects library in Premiere Pro, simply navigate to the “Effects” tab in the bottom-left corner of the interface. From there, you can browse through the different categories and subcategories to find the perfect effects for your vlogs. Experiment with different effects and combinations to add your own unique style to your videos.
Timing Transitions for Viewer Engagement
Timing is crucial when it comes to transitions in your vlogs. A well-timed transition can enhance the flow of your video and keep your viewers engaged. When choosing transitions, consider the pace and mood of your vlog. Smooth, subtle transitions work well for calm and introspective moments, while fast and dynamic transitions are suitable for energetic and action-packed sequences.
To achieve the desired timing, you can use Premiere Pro’s keyframe animation feature. By adding keyframes to your transitions, you can control their start and end points, as well as adjust the timing of the transition to match the rhythm of the music or the energy of the scene. Remember to experiment and fine-tune the timing until you achieve the desired effect.
| Transition Type | Effect |
|---|---|
| Cross Dissolve | A smooth transition that blends two clips together |
| Slide | Slides one clip off the screen while revealing the next clip |
| Zoom | Creates a zoom-in or zoom-out effect between clips |
| Wipe | Wipes one clip off the screen while revealing the next clip |
Table: Common Transition Types and Their Effects
Adobe Premiere Pro: Crafting Your Vlog’s Visual Identity
Creating Consistent Branding Elements
Crafting a strong visual identity for your vlog is crucial in establishing your brand and making your content easily recognizable. In Adobe Premiere Pro, you have the tools to create consistent branding elements that reflect your style and message.
Begin by designing a logo or using your existing logo as the main branding element. This logo will be incorporated in various parts of your vlogs, such as the opening and closing sequences, lower thirds, and watermark. Make sure the logo is clear, visually appealing, and aligned with your vlog’s theme.
To maintain consistent branding, you should establish a color scheme that aligns with your brand’s aesthetic. Choose a set of colors that complement your logo and evoke the desired mood of your vlogs. Stick to these colors when creating titles, captions, and graphics.
Furthermore, select a consistent font or typography that enhances your brand’s visual identity. A font that is legible, modern, and in line with your branding can add a professional touch to your vlogs.
By incorporating these consistent branding elements throughout your vlogs, you create a cohesive visual experience for your audience. This helps build brand recognition and establishes a strong connection between your vlogs and your brand.
Adding Titles, Captions, and Graphics
In addition to consistent branding elements, Adobe Premiere Pro allows you to enhance the visual appeal of your vlogs by adding titles, captions, and graphics.
To reinforce your vlog’s storytelling, consider including titles at the beginning of your videos to introduce the topic or segment. These titles can also be used to highlight key points or emphasize important information throughout your vlogs.
Adding captions to your vlogs can greatly improve accessibility and engage viewers who prefer or require captions. Adobe Premiere Pro offers tools to easily create and customize captions, making your vlogs more inclusive and accessible to a wider audience.
Graphics, such as lower thirds or animated overlays, can be used to display additional information, highlight key moments, or add visual interest to your vlogs. Be sure to design these graphics in line with your branding elements to maintain consistency.
When adding titles, captions, and graphics, ensure they are visually appealing, easy to read, and enhance rather than distract from the content of your vlogs. Experiment with different styles, animations, and placements to find the ones that best suit your vlog’s visual identity.
Fine-Tuning Narrative with Adobe Premiere Pro
The narrative aspect of your vlogs plays a significant role in capturing and retaining your audience’s attention. With Adobe Premiere Pro, you have the power to fine-tune your vlog’s narrative and create a captivating storytelling experience. By utilizing the software’s features and techniques, you can shape your vlog’s journey through story arcs and employ transition techniques for seamless storytelling.
Story Arcs: Shaping Your Vlog’s Journey
Story arcs are essential in guiding your vlog’s narrative and engaging your audience. They create a structure and progression that keep viewers invested in your content. With Adobe Premiere Pro, you can shape your vlog’s journey by visually mapping out your story arcs. The software allows you to rearrange and sequence your footage, ensuring a cohesive and compelling narrative flow.
“Creating a strong story arc in your vlog is like taking your audience on a journey. You want to build anticipation, create moments of tension, and deliver satisfying resolutions. Adobe Premiere Pro empowers you to craft these story arcs with precision and impact.”
Consider the themes and messages you want to convey through your vlog. Identify the key moments and emotions you want to evoke in your audience. By strategically arranging your footage and organizing it into story arcs, you can guide your viewers through a compelling vlog experience.
Transition Techniques for Seamless Storytelling
Transitions are crucial in maintaining the flow and smoothness of your vlog’s narrative. They allow you to seamlessly connect different scenes and create a cohesive storytelling experience. Adobe Premiere Pro offers a wide range of transition effects and techniques that you can use to enhance your vlog.
With the software’s intuitive interface, you can easily apply and customize various transition effects such as fades, cuts, wipes, and dissolves. These techniques help create a seamless transition between shots, keeping your audience engaged and immersed in your vlog’s narrative.
Experiment with different transition styles and effects to find the ones that best complement your vlog’s tone and story. Use them sparingly and intentionally to ensure they enhance the overall storytelling experience.
By fine-tuning your vlog’s narrative with Adobe Premiere Pro, you can create captivating and impactful vlogs that resonate with your audience. Use the software’s tools and techniques to shape your vlog’s journey through story arcs and employ seamless transition techniques for a cohesive storytelling experience.

Effective Calls-to-Action in Vlog Editing
Calls-to-action (CTAs) play a crucial role in engaging your viewers and encouraging them to take action. A well-crafted CTA can significantly influence viewer behavior and increase meaningful engagement with your vlogs. In this section, we will discuss effective strategies for incorporating CTAs into your vlog editing to maximize viewer engagement and drive desired outcomes.
One effective approach to implementing CTAs is to strategically place them at key moments throughout your vlogs. For example, you can insert a CTA at the end of your video, prompting viewers to like, share, or comment on the content. Including overlays or pop-up CTAs within your vlog can also guide viewers to subscribe to your channel, visit your website, or explore related videos.
To make your CTAs more compelling, consider using persuasive language and clear directives. Encourage viewers with phrases like “Don’t forget to subscribe for more content like this!” or “Join the conversation by leaving a comment below.” By creating a sense of urgency or exclusivity, you can motivate viewers to take immediate action and become active participants in your vlogging community.
Visual cues can also enhance the effectiveness of your CTAs. Highlighting CTAs with eye-catching graphics, animations, or colors can make them more attention-grabbing and memorable. Additionally, using annotations or interactive elements like clickable buttons can provide a seamless user experience and make it easier for viewers to engage with your CTAs.
Furthermore, personalizing your CTAs can help establish a stronger connection with your audience. Addressing viewers directly and tailoring CTAs to their interests and preferences can make them feel more valued and inclined to respond. Additionally, incorporating a sense of reciprocity by offering exclusive content or rewards in exchange for taking action can further incentivize viewer engagement.
Lastly, continuously analyzing the performance of your CTAs is essential for refining your approach and optimizing engagement. Pay attention to metrics such as click-through rates, conversion rates, and audience feedback to gain insights into the effectiveness of different CTAs. Experiment with variations in placement, wording, and design to find what resonates best with your audience and drives the desired outcomes.
By implementing effective CTAs in your vlog editing, you can harness the power of viewer engagement and encourage meaningful interactions with your content. The next section will focus on the process of exporting Adobe Premiere Pro projects for various social platforms, ensuring that your vlogs reach a wider audience.
Image: CTAs in Vlog Editing
Exporting Adobe Premiere Pro Projects for Social Platforms
Ensuring Compatibility with YouTube
When it comes to sharing your vlogs on social platforms, exporting your Adobe Premiere Pro projects correctly is crucial. One of the most popular platforms for vloggers is YouTube, and ensuring compatibility with YouTube’s specifications is essential for a smooth uploading process and optimal viewing experience for your audience.
To export your Premiere Pro project for YouTube, you can follow these simple steps:
- Select the sequence you want to export by clicking on it in the project panel.
- Go to the “File” menu and choose “Export” followed by “Media”.
- In the export settings window, select the desired format and preset. For YouTube, a commonly used format is H.264 with the preset “Match Source – High Bitrate”.
- Adjust the resolution and frame rate settings to match the requirements of your YouTube channel. YouTube supports various resolutions, including 1080p (Full HD) and 4K.
- Under the “Video” tab, check the “Use Maximum Render Quality” box to ensure the best possible video quality during the export process.
- Specify the output destination and filename for your exported video.
- Click “Export” to start the exporting process.
By following these steps, you can ensure that your Adobe Premiere Pro projects are compatible with YouTube, allowing you to seamlessly share your vlogs with your audience and reach a wider viewership.
Tips for Preserving Video Quality Upon Export
Preserving the quality of your vlogs is essential for delivering a visually appealing experience to your viewers. When exporting your Premiere Pro projects, keeping the video quality intact is a top priority. Here are some tips to help you preserve video quality:
- Choose the appropriate video format and codec for exporting. Formats such as H.264 and ProRes are commonly used for high-quality video.
- Set the resolution and frame rate of your exported video to match the settings of your original footage.
- Pay attention to the bitrate settings. Higher bitrates result in better video quality but also larger file sizes.
- Ensure the color profile and color depth settings are properly configured for accurate color reproduction.
- Avoid excessive compression that can degrade video quality. Balancing file size and quality is crucial.
By implementing these tips, you can ensure that the video quality of your vlogs is preserved throughout the exporting process, resulting in visually stunning content for your audience to enjoy.
Expanding Your Skills: Adobe Premiere Pro’s Advanced Features
Take your vlogging editing skills to the next level with Adobe Premiere Pro’s advanced features. In this section, we will explore some of the powerful tools and techniques that Premiere Pro has to offer, empowering you to create truly exceptional vlogs.
“The advanced features of Adobe Premiere Pro allow vloggers to push the boundaries of their creativity and storytelling, transforming their videos into captivating visual experiences.”
1. Lumetri Color Panel
The Lumetri Color Panel is a powerful tool within Premiere Pro that allows you to manipulate and enhance the colors in your vlogs. Utilize the wide range of color grading options to give your videos a unique and professional look. Experiment with different color presets, adjust exposure, contrast, saturation, and more to achieve the desired visual impact.
2. Multi-Camera Editing
If you frequently use multiple cameras in your vlogs, Premiere Pro’s Multi-Camera Editing feature is a game-changer. Easily synchronize and switch between different camera angles, allowing for seamless transitions and dynamic storytelling. This feature is particularly useful for capturing events, interviews, or any scenario where multiple camera angles are involved.
3. Advanced Audio Editing
Sound is a critical component of vlogs, and Premiere Pro offers advanced audio editing capabilities. Take advantage of features such as audio track mixing, noise reduction, audio leveling, and precise control over audio effects and transitions. Enhancing the audio quality of your vlogs will greatly contribute to a more professional and engaging viewer experience.
4. Motion Graphics Templates
Add visual flair to your vlogs with Premiere Pro’s ready-to-use Motion Graphics Templates. These pre-designed graphics can be customized and tailored to suit your branding and storytelling needs. Easily incorporate lower thirds, titles, transitions, and other graphical elements to elevate the visual appeal of your vlogs.
5. Time Remapping
Time Remapping is an advanced technique that allows you to manipulate the speed and timing of your footage. Whether you want to create slow-motion or fast-motion effects, time remapping gives you precise control over the pacing of your vlogs. Experiment with different speeds to add drama, emphasis, or comedic effect to your videos.
6. Advanced Keyframing
Keyframing is an essential skill in advanced editing, and Premiere Pro offers extensive keyframing capabilities. With keyframes, you can create intricate animations, control the movement and properties of elements within your vlogs, and add visual interest. Mastering advanced keyframing techniques will unlock a world of creative possibilities for your vlogs.
7. Dynamic Link with Other Adobe Applications
Premiere Pro seamlessly integrates with other Adobe applications, such as After Effects and Audition, through Dynamic Link. This feature allows for smooth collaboration between different software, enabling you to leverage the specialized features of each application. Take advantage of After Effects for advanced visual effects or Audition for precise audio edits, all while keeping your workflow efficient and streamlined.
By diving into these advanced features of Adobe Premiere Pro, you can expand your editing skills, experiment with advanced techniques, and unleash your creative potential. Mastering these tools will elevate the quality and impact of your vlogs, setting you apart from the competition.
Conclusion
In conclusion, Adobe Premiere Pro is the ultimate video editing software for vloggers seeking to create professional-quality videos. Throughout this article, we have explored various vlogging tips and techniques that can be seamlessly implemented using this powerful tool.
By leveraging the comprehensive features and user-friendly interface of Adobe Premiere Pro, vloggers of all levels can elevate their content to new heights. Whether you’re a beginner or an experienced vlogger, Premiere Pro offers a range of editing tools and effects to enhance the storytelling aspect of your vlogs.
We have discussed the importance of privacy and setting boundaries, the significance of crafting a vlogging schedule for better work-life balance, and the art of engaging your audience through personal narratives and creative visual elements. Additionally, we have covered essential topics such as recording tips, audio editing standards, and the incorporation of music and sound effects.
With Adobe Premiere Pro, you have the ability to refine your video quality, establish a consistent visual identity, fine-tune your narrative, create effective calls-to-action, and export your projects for seamless sharing on social platforms. By mastering the advanced features of Premiere Pro, you can take your editing skills to the next level and set yourself apart as a vlogging professional.
So, as you embark on your vlogging journey, remember to harness the power of Adobe Premiere Pro. By applying the tips and techniques covered in this article, you can create captivating and high-quality vlogs that resonate with your audience and leave a lasting impression.


Add comment